What Are You Looking For?

A solar mounting system inspection checklist should cover the roof or foundation condition, mounting brackets, rails, mid clamps, end clamps, fasteners, corrosion, waterproofing, grounding, cable management, and overall structural stability. These checks help installers and system owners identify loose connections, material deterioration, water leaks, and other issues before they develop into more serious problems.
A reliable inspection should not focus only on whether solar panels are still in place. The entire load path—from the roof attachment or ground foundation to the mounting rails and module clamps—needs to be checked. For systems using components from SIC SOLAR roof mounting systems, the inspection should also confirm that the selected components remain suitable for the roof type, environmental conditions, and original installation design.
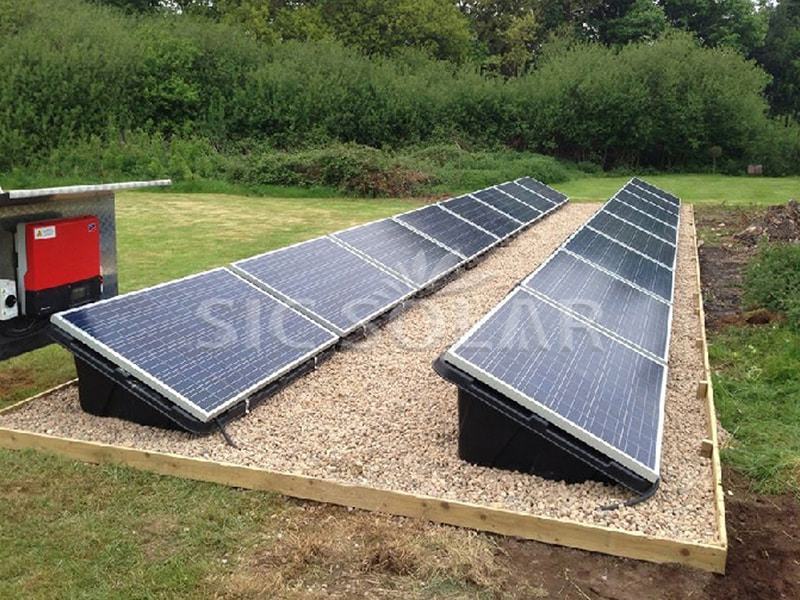
A solar mounting structure operates outdoors for years, exposed to wind, rain, temperature changes, ultraviolet radiation, and sometimes salt spray or heavy snow. These conditions can affect fasteners, protective coatings, roof attachments, and structural connections over time.
Routine inspection helps identify early warning signs, including loose bolts, shifted rails, damaged roof seals, corrosion, and movement around attachment points. It also provides a record of the system's condition, making it easier to compare changes between inspections.
Inspection frequency should reflect the project environment, system design, manufacturer recommendations, and local requirements. Coastal installations, systems exposed to severe weather, and arrays with a history of structural issues may need more frequent professional checks. Inspections should also be considered after significant storms or other events that could affect mounting stability.
The following checklist provides a practical starting point for solar installers, maintenance teams, and commercial system owners. Record each result as pass, needs attention, or not applicable, and add photographs or notes when a defect is found.
Not every item can be verified by visual inspection alone. Where a check requires measurements, torque verification, electrical testing, or structural assessment, qualified personnel should use the appropriate procedure and equipment.
Start by identifying the roof type and the mounting method used in the original installation. Tile roofs, standing-seam metal roofs, corrugated metal roofs, and flat roofs use different attachment methods. A bracket that is appropriate for one roof profile may not be suitable for another.
Check whether the attachment points remain in their intended positions. Look for cracked tiles, deformed brackets, movement around fasteners, damaged roof sheets, and signs of water entering the building. On metal roofs, inspect the condition of the roof seams and the contact areas between clamps and the roof profile.
For installations using solar roof clamps for roof mounting systems, confirm that the clamps remain correctly seated and secured according to the product instructions. Do not assume that every clamp should be retightened during every inspection. Unapproved adjustment can damage components or compromise the original connection.
Any suspected movement, structural damage, or roof leakage should be investigated before the system is considered safe for continued operation.
Mounting rails distribute the loads from solar modules to the supporting brackets. Rail alignment and connection quality therefore matter to the stability of the entire array.
Inspect rails for visible bending, twisting, cracks, unusual gaps, or changes in alignment. Check that rail connectors remain in position and that connected sections have not shifted. Pay particular attention to joints and attachment areas, where movement or concentrated stress may become visible.

Where the system uses solar panel mounting rails, compare their current condition with the original layout and installation requirements. Rail spans, support spacing, connector placement, and fastener specifications should follow the approved design rather than a generic spacing rule.
Do not straighten a visibly deformed rail or modify a connector without technical approval. If a rail has shifted or its structural integrity is uncertain, arrange a qualified assessment before making repairs.
Clamps secure solar modules to the mounting rails. During an inspection, look for missing clamps, incorrect positioning, damaged clamp bodies, displaced bolts, and visible gaps between the clamp and module frame.
Mid clamps should sit between adjacent modules as specified by the mounting design. End clamps should secure the outer edges of the array. The clamp dimensions must also match the module frame thickness and the compatible rail system.
For systems using solar mounting mid and end clamps, verify that the installed components match the relevant product specifications. If a fastener appears loose or damaged, follow the manufacturer's inspection and tightening procedure. Use the specified torque value where torque verification is required; do not tighten by feel or apply a universal torque value to every connection.
Rust staining, damaged threads, missing hardware, or repeated loosening should be documented and investigated. Replacing a fastener with a visually similar but incompatible item may affect connection strength or corrosion resistance.
Corrosion can weaken metal components and affect the reliability of mounting connections. Inspect aluminum rails, steel brackets, stainless steel fasteners, washers, and other exposed parts for rust-colored stains, pitting, flaking coatings, white powdery deposits, or unusual surface deterioration.
Pay special attention to coastal and industrial environments, where salt and airborne contaminants may accelerate corrosion. Check joints and contact areas where moisture can remain trapped. Also confirm that the materials and protective finishes are appropriate for the environmental conditions specified for the project.
For example, an anodized aluminum rail and a stainless steel fastener may be used together in a mounting system, but material selection alone does not guarantee that every connection is suitable for every environment. The full assembly, including washers, coatings, isolation measures where required, and drainage, should be considered.
When corrosion is found, determine its extent before deciding whether cleaning, component replacement, or a more detailed engineering assessment is needed. Do not cover corrosion with paint or sealant without identifying the cause and confirming that the repair method is appropriate.
On rooftop systems, a mounting structure can be mechanically secure while still allowing water to enter the building. Inspect roof penetrations, sealing washers, flashing, and other waterproofing details for cracks, displacement, deterioration, or signs of leakage inside the building.
Check that drainage paths remain clear and that the mounting structure does not create areas where water or debris accumulates. Any damaged roof membrane or suspected leak should be assessed using a repair method suitable for the roof system.
Solar cables should be supported and routed so they do not rub against sharp edges, hang loosely, become trapped beneath mounting components, or remain under tension. Inspect cable clips and ties for damage, and look for cracked insulation, exposed conductors, or connectors that have been pulled out of their intended position.
Electrical grounding and bonding also require attention. Confirm that the designated components are present and that connections have not been disturbed by corrosion, maintenance, or component replacement. Electrical testing and any work on live equipment must be handled by qualified personnel under the applicable safety procedures.
There is no single inspection interval that fits every solar mounting system. The schedule should be based on the mounting system manufacturer's instructions, the project maintenance plan, local regulations, the installation environment, and the consequences of a potential failure.
Never access a roof or climb onto a mounting structure without suitable fall protection and an appropriate safe-work plan. Visual checks from the ground or other safe locations may help identify concerns, but they do not replace a professional inspection where closer access is necessary.
A useful solar mounting system inspection checklist should produce an actionable record, not just a general statement that the system looks fine. For each inspection, record the date, system location, inspector, weather or site conditions, items checked, findings, photographs, and recommended corrective actions.
Classify findings according to their actual risk. A cosmetic mark may require monitoring, while a displaced bracket, visibly damaged rail, suspected structural failure, or compromised electrical connection may require prompt action. If a condition could affect safety or structural stability, restrict access or operation as appropriate until qualified personnel assess it.
For recurring issues, compare inspection records over time. Repeatedly loose fasteners, recurring leakage, or corrosion at the same connection point may indicate a deeper installation, material compatibility, or environmental problem rather than an isolated defect.
For project owners comparing mounting components or planning replacements, SIC SOLAR provides different solar mounting components, including rails, clamps, roof attachments, and related accessories. Component selection should always be checked against the existing system design and the relevant technical specifications.
Use this quick reference during maintenance planning. Mark each item as pass, needs attention, or not applicable, and document any finding that requires follow-up.
| Inspection area | What to verify | Record |
|---|---|---|
| Roof or foundation | Damage, movement, cracks, leakage | Condition and photos |
| Brackets and attachments | Position, deformation, missing hardware | Location and action |
| Rails and connectors | Alignment, joints, visible bending | Observed changes |
| Clamps and fasteners | Position, damage, specified tightness | Defects and verification |
| Corrosion | Rust, pitting, coating damage | Severity and location |
| Waterproofing and drainage | Seals, leaks, blocked drainage | Leakage or damage |
| Grounding and cables | Bonding connections, cable support, insulation | Required electrical follow-up |
| Overall array | Panel alignment, movement, unusual changes | Corrective action and review date |
What should be included in a solar mounting system inspection checklist?
It should include roof or foundation condition, brackets, rails, rail connectors, mid and end clamps, fasteners, corrosion, waterproofing, drainage, grounding, cable management, and overall array stability. Inspection records should include findings, photographs, and corrective actions.
How often should solar mounting systems be inspected?
Inspection frequency depends on the manufacturer's instructions, local requirements, site conditions, and the maintenance plan. Additional checks may be needed after severe weather, repairs, or signs of movement, corrosion, or leakage.
What are the warning signs of a solar mounting system problem?
Warning signs include shifted rails, visibly deformed brackets, missing clamps or bolts, corrosion, damaged roof seals, water leaks, loose cables, and panels that appear out of alignment. Structural or electrical concerns should be assessed by qualified professionals.
Should solar mounting bolts be tightened during every inspection?
No. Inspectors should follow the manufacturer's instructions and approved maintenance procedures. Where torque verification or tightening is required, use the specified torque value and appropriate tools rather than applying a universal value.
Can a visual inspection confirm that a solar mounting system is structurally safe?
Not in every case. A visual inspection can identify obvious problems, but concealed damage, uncertain load capacity, or suspected structural failure may require measurements, testing, or assessment by a qualified engineer.
What should be checked on solar mounting systems after a storm?
Check for displaced panels, shifted rails, damaged brackets, loose or missing components, roof damage, leakage, and other visible changes. Arrange a professional inspection if the system may have suffered structural damage, and do not approach unsafe areas.
Why is corrosion inspection important for solar mounting structures?
Corrosion can damage protective coatings and weaken metal components or connections. Coastal and industrial environments may require closer monitoring because salt and airborne contaminants can accelerate deterioration.
Does SIC SOLAR provide components for solar mounting systems?
SIC SOLAR offers mounting solutions and components such as solar mounting rails, roof clamps, mid clamps, end clamps, and related accessories. The correct components depend on the roof or foundation type, project design, environmental conditions, and compatibility requirements.



 IPv6 network supported
 English
 Deutsch
 español
 português
 Nederlands
 العربية
 日本語
 한국의
 Melayu
 Tiếng việt